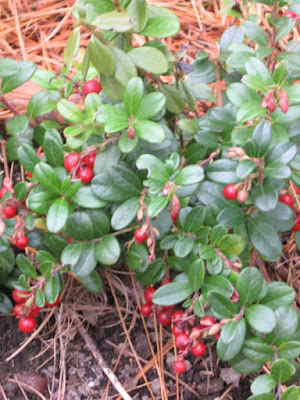
 Lingonberries, native to Scandinavia, make a beautiful (and edible) ground cover under the taller blueberry bushes. A late fall treat.
 Even as our part of the world transitions to late fall, our transition to year-round growing means that we witness new beginnings and new harvests. The salad greens planted from August through late September are our contribution to this year's Thanksgiving dinner: mesclun lettuce mix from the cold frames; arugula, spicy mustard greens, minutina, mache, claytonia, and beet leaves protected under plastic hoops. Beet, carrot, turnip and radish -- stored in the ground where they grew -- were shredded and tossed. Licorice flavored sweet cicely leaves, which I was surprised to find still surviving nestled under nearby branches, went in the salad as well.
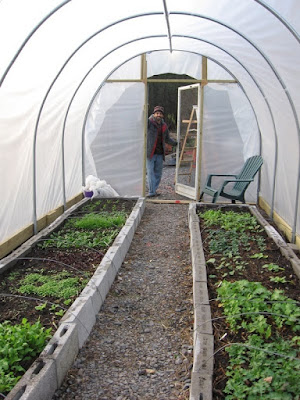
After last year's encouraging experiment growing winter greens under low hoops (rickety ones at that, thrown together at the last moment), we put together a walk-in "high tunnel." Or as some local farmers more attractively (and perhaps more accurately) advertised, a "passive solar greenhouse." It will serve to grow a variety of semi-hardy greens (plus some transplanted dill and scallions) from now until spring, protecting them from snow and frost with a cover of plastic and warming them by trapping heat on sunny days.
The seeds went in a bit late (September, rather than August) so the semi-hardy, but day-light sensitive cooking greens are still small, but they should begin to grow rapidly in February, when the days noticeably lengthen. Here are some photos of the building process:
 Margo and Kat taking a break. In the background, a "low hoop" covers mustard greens, cabbage, and beets.


HI Margo,
ReplyDeleteGreat blog! I'm very curious about your high tunnel. Did you bend the frames yourselves/buy a kit or recycle something? What are the dimensions, and what would you do different? I am hunkered down in northern MN and ready for a high tunnel here. Zone 3!
-Theo
Thanks, Theo! I love the growing interest in high tunnel gardening.] We bought pre-bent frames and plastic as a "kit" from FarmTek, then purchased the baseboard & end-wall lumber and used doors locally. Our tunnel is 10' x 24' feet, because we were putting it in an old driveway, and that was the available width. The main thing I'd do differently is create the tunnel is increments of 12' wide -- 3' bed + 1' path. We can only fit two beds in a 10' tunnel; we could have fit 3 beds in a 12' one. Much more efficient use of space! Check back; I'm hoping to start blogging again soon, and will write more about our experience with the tunnel. I highly recommend it! Good luck!
ReplyDelete